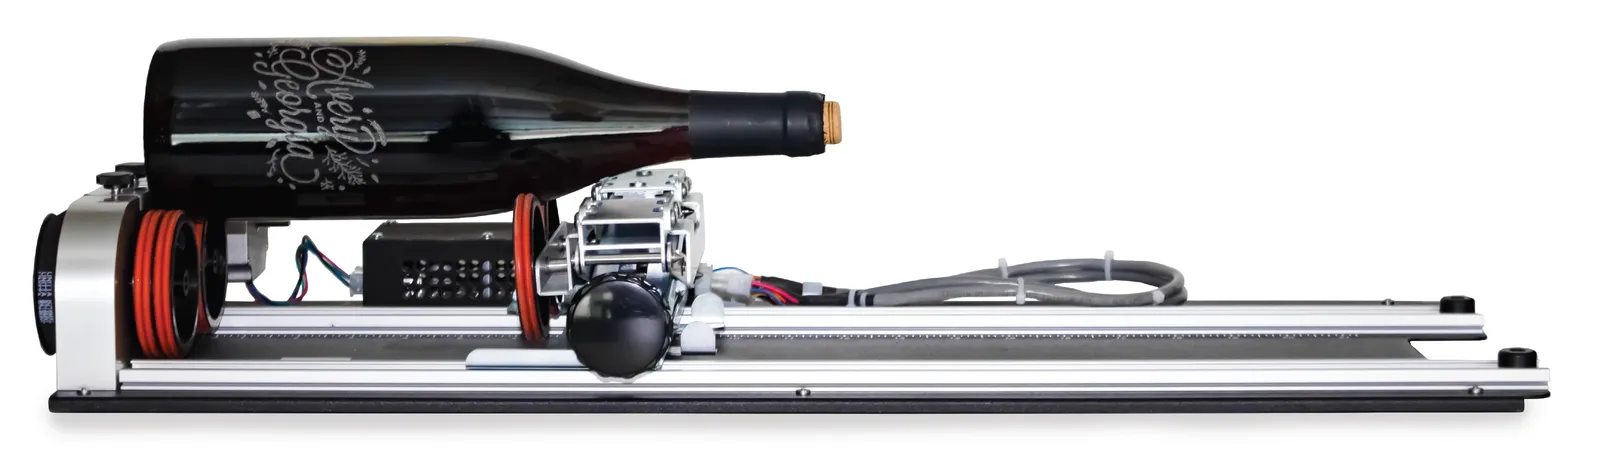
Rotary Attachments for Epilog Lasers: Rim-Drive or Chuck?
A rotary attachment turns a tumbler, bottle or glass as the laser engraves around it. Epilog offers rim-drive and 3-jaw chuck versions for compatible systems, and the choice starts with how the piece can be held. Here’s what to check before you choose one, and before you run the first job.
Rim-drive: supported on wheels
On Epilog’s rim-drive rotary, the powered wheels turn the cylinder while an adjustable support holds the other end. You move that support to suit the length, then raise or lower it to level the engraving area.
This is an option for glasses, bottles, tumblers and vases. Epilog also shows handled mugs on the rim-drive. On the Fusion rim-drive version described in its documentation, removable front wheel sections provide extra room for some handles.
For a straight cylinder, the rim-drive automatically accounts for diameter. You still need to measure the piece to lay out the artwork and check clearance.
Chuck rotary: held by the jaws
Epilog’s 3-jaw chuck rotary grips the piece. Depending on the item and fixture, the jaws can hold from inside an opening or around the outside. Interchangeable jaws, fixture plates and centring components accommodate different shapes.
Epilog describes this style as suited to non-uniform cylinders and applications needing precise alignment. Consider it when the piece needs a firm grip or a different fixture arrangement from the rim-drive.
Measure the cylinder diameter. The documented Fusion Edge/Pro chuck workflow requires that measurement in the driver. Follow the instructions for your machine and software version when selecting the rotary mode.
What can you engrave?
The shape determines how you hold the item. The material and laser source determine the mark:
- Glass drinkware and bottles: Epilog demonstrates rotary engraving on glass mugs, wine glasses and bottles with CO₂ systems.
- Powder-coated tumblers: a CO₂ laser can remove the coating to reveal the stainless steel underneath.
- Bare stainless steel cylinders: Epilog describes using a metal marking compound with CO₂ to produce a bonded mark. Its fibre systems can mark bare metal directly.
A rotary doesn’t change material compatibility. If you’re choosing a laser as well as an attachment, start with the Epilog systems page and the materials you plan to engrave.
Setting up the first job
The following points summarise Epilog’s Fusion Edge/Pro lessons. Use the manual for your exact machine and software version for installation and controls.
- Lower the table, then switch the laser off. Leave enough room for the rotary and workpiece. Connect or disconnect the rotary only with the machine powered off, then restart after installation.
- Seat and level the piece. Adjust the support for its length and level the area you will engrave. Epilog recommends checking with a small level. On the chuck, select the appropriate fixtures and secure the item firmly.
- Focus manually. Epilog’s chuck instructions specify manual focus and rule out autofocus. Its rim-drive lesson also uses the manual gauge. Remove the gauge after focusing.
- Check artwork orientation and position. In Epilog’s rim-drive lesson, rotate the graphic 90 degrees, select Center-Center positioning and enable the rotary setting. Set the matching centre point on the piece with the red dot pointer. For the chuck lesson, select Center-Center positioning and the 3-Jaw Chuck option, then enter the measured diameter.
- Test the actual blank. Start with Epilog’s material settings for your machine and wattage, then test before committing a batch. Its wine tumbler project recommends testing the engraving parameters.
Limits to check before taking an order
Machine fit. Rotary capacity varies by laser model. Check the permitted diameter and length for the machine and attachment together. Epilog’s accessory store asks for the machine serial number to verify compatibility; include yours when discussing an attachment.
Tapers and changing diameters. Levelling the engraving area helps maintain focus, but artwork proportions need a separate check. Epilog explains that a rim-drive job can appear stretched or compressed when the diameter at the drive wheels differs from the diameter where you engrave. Its documentation gives a method for scaling artwork in the direction of rotation. Test the proportions on your particular shape before attempting a wrap.
Coatings. Don’t assume every finish will behave alike. Epilog notes that some hard coatings are difficult to remove cleanly. Test the exact drinkware you intend to use.
Choosing a rotary in Canada
Synergy Products is Canada’s exclusive Epilog dealer. Contact us with your machine model, serial number, item dimensions and artwork. Showrooms in Delta, BC and Mississauga, ON are available by appointment. Those details give the discussion a useful starting point: what you want to engrave, how it can be held and which attachment fits your machine.
Questions About a Laser?
Call or send us your application. Demos are available at our Delta and Mississauga showrooms by appointment, or live online: send us your files and we'll run your parts on a real laser while you watch over video call.